
In recent years, there is a trend toward so-called low-code and no-code platforms. While no-code platforms often appeal to businesses lacking internal development resources, teams often find they still need at least some code to properly meet all of their business requirements.
Today, low-code platforms are more sophisticated and useful than ever, and, more than ever and as a result more and more businesses are starting to use them. One example is Microsoft Power Apps, which provides many data sources and service integrations out of the box. Still, even in a more sophisticated environment, you won’t always find a premade integration to solve a problem. Therefore, low-code does not normally mean no-code because some coding and customization is required to meet individual needs.
For example, when you think about potential data integrations, you might want to make an HTTP-based call to a web service and this typically requires some sort of authentication, possibly with an API key or some other secret.
For multiple reasons, the last thing you want to do is hardcode this secret or any secret because it will be then be accessible to anyone with collaboration rights to the the code. This highlights the need for a secret management solution such as Conjur.
In this article, we’ll show you how to retrieve app secrets from Conjur in a Power Apps application. We’ll build a small sample application with a proper data connector to show you just how easy it is to integrate Conjur with Power Apps. To follow this tutorial, you should have some previous experience programming with C#.
Create a Power App
The Power Apps platform is a web app. This means no installation is required to get started. Just go to make.powerapps.com, log in, and start creating.
You can choose from several templates. Since we want to showcase how to call web services using a secret retrieved from Conjur, we’ll need to integrate a custom API into our Power App.
You can use Power Apps to create three different types of apps:
We’ll use a canvas app. It’s more flexible and enables us to focus on the API call instead of building some model for a predefined connection.
After choosing a canvas app, we select the layout. In this example, we use a blank phone layout.
We now drop in elements reflecting what we want to see and use in the app. Because we need a way to display our output — for example, a label — we can just change the text (by default, “Text”) to be something like:
'conjur-test.azurewebsites.net'.apireadsecret()
Here, the first part is the name of a data element that was added to the editor. The second part is the specific API call, which looks like a function call. You can place arguments between the parentheses.
Now, all that’s left is to read a secret from Conjur. To do this, we integrate a custom connection. First, we need to create a custom connector. While it’s possible to make a request directly against the Conjur API, a better way is to use Azure Functions since Azure services are already fully connected with Power Apps and authentication is handled within Microsoft’s own infrastructure. Otherwise, we would be replacing a hardcoded token with a service connection requiring a much more powerful hardcoded secret, which is never a good idea.
Let’s set up an Azure Function instance to communicate with Conjur.
Integrate an Azure Function Call
First, let’s create a new Azure Function using the Azure Management Portal. Get the Function App from the Azure Marketplace.
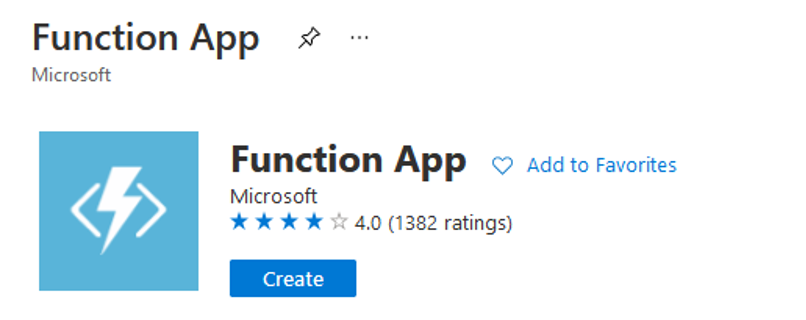
Place it in a subscription using any resource group. The name of the function is arbitrary. We’ll use .NET as a runtime stack, but you can use whatever you’re most comfortable with. The OS choice is also up to you. While Linux may look like a lightweight solution, Windows actually has more Azure Functions support. For instance, you cannot edit a Linux-based Azure Function within the Azure management portal.
By using a consumption plan, we’ll only pay for the resources we use when they are requested. This is the classic “serverless” approach, where you do not pay for running servers, only for interactivity.
Once the new Azure Functions instance is ready, we add a function. In this case, we can do that already from the Azure Management Portal. Use the “HTTP trigger” template and choose the “function” authorization level.
The code for the first function can be as simple as:
using System.Net;

public static async Task<HttpResponseMessage> Run(HttpRequestMessage req, TraceWriter log)
{
   log.Info("C# HTTP trigger function processed a request.");
   return req.CreateResponse(HttpStatusCode.OK, "Hello World");
}
We also need to change the runtime version to 1 for the Azure Power Apps integration to work. If we start at a newer version (for example, 3) this triggers a warning before the migration. We wrote the code above for the older runtime.
In the portal, the warning looks like:
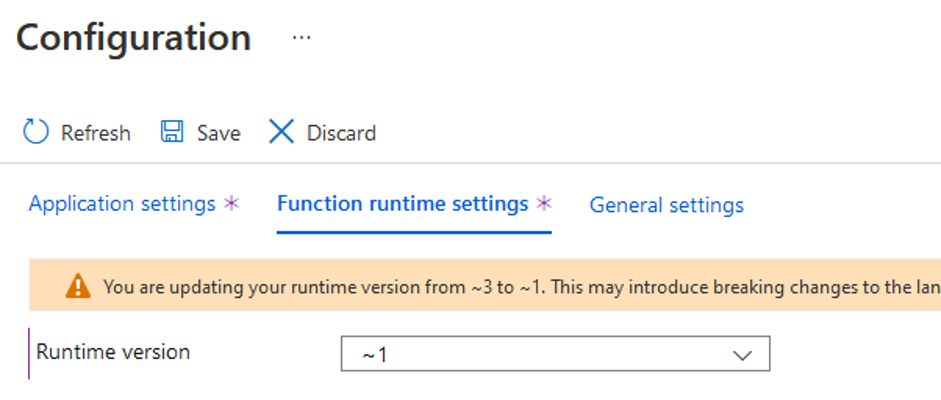
Finally, we also need to publish the Swagger (or API) definitions and enable cross-origin resource sharing (CORS). While the API definitions are rather easy to set up, the correct CORS value may be tricky. For now, we can use the wildcard option to allow all hosts.
Once we set all this up, it’s time to create the custom connector.
You can create the custom connector via the data pane. When we use “Create from Azure Service (Preview)”, this yields a dialog similar to the following image:
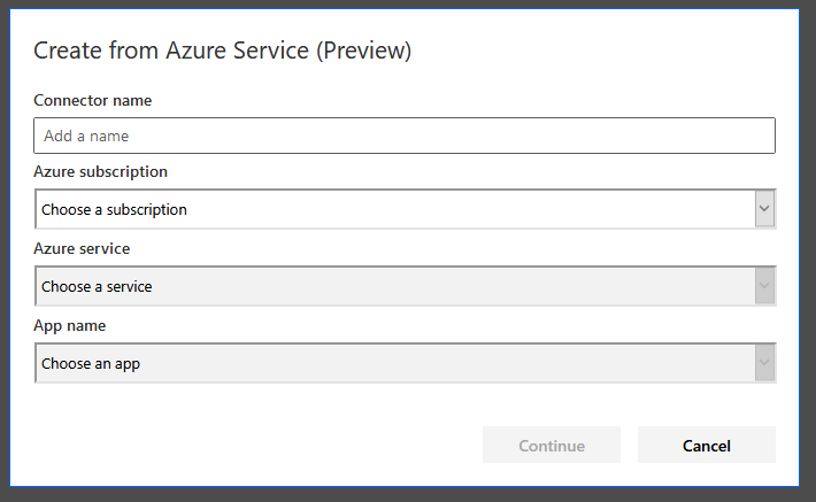
We can now fill out the fields using the information for our created function. The combination boxes are automatically filled in order. Once we select one of the reachable subscriptions (tied to the same account we’ve used to log in to create a Power App), the available services are displayed. Once we select our Azure Functions service, we select the function, that is, the ‘hello world’ function from above or, later on, the real function for retrieving the secret.
Now, it’s time to set up Conjur in the Azure Function.
Set Up Conjur in an Azure Function
You can add Conjur support in an Azure Function quite easily using the Conjur SDK for .NET. This enables the function to communicate with the Conjur Vault to obtain secrets, among other things. Find the project on GitHub.
In short, we can simply bring all the necessary classes over and start using the Client class. Essentially, this enables us to write code like this:
var conjurClient = new Client(url, account); // create a new conjur client
var conjurAuthToken = conjurClient.LogIn(username, password); // log in
var conjurVariable = new Variable(conjurClient, variableId); // access the variable
var isAllowed = conjurVariable.Check("execute"); // check privileges

if (!isAllowed)
{
    throw new InvalidOperationException("Something is not right. Failed to access variable.");
}
else
{
    conjurVariable.GetValue();
}
Knowing the URL of the Vault, the username and password of its associated account, as well as the variable to read, we can now access the desired values.
To set up a function to retrieve secrets from a Vault, see “ ”.
Now it’s time to actually use the secret within a Power App. There are two ways to request a desired target service with a secret retrieved from the function:
- Call the function first, retrieve the secret, then call the target service, for example, via another custom connector with the secret as input.
- Perform the final API request within the function call — not returning a secret at all, just the response from invoking the target service.
While the first option is more flexible (and presumably cheaper!), the second option is definitely easier. In the end, you should mostly decide based on whether the function should be reused for other purposes. If the single Power App is the only consumer of the function, it may make more sense to go with the second option. Otherwise, you should use the first option.
For our simple example, we don’t need to reuse the function. We also don’t want the additional complexity of maintaining two different custom connectors, where we only use one to pass data to the other one.
Based on the previous snippet, we create the following code (for proxying a GET request from an API accessible via the URL specified in the apiEndpoint variable).
using (var client = new HttpClient())
{
   client.DefaultRequestHeaders
     .Accept
     .Add(new MediaTypeWithQualityHeaderValue("application/json"));

   client.DefaultRequestHeaders.Add("X-API-KEY", conjurVariable.GetValue());

   var result = await client.GetAsync(apiEndpoint);
   var resultContent = await result.Content.ReadAsStringAsync();
   req.CreateResponse(HttpStatusCode.OK, resultContent);
}
This creates a request to the resource protected by an API key that is retrieved from a Vault.
Conclusion
In this article, we’ve seen how easy it is to actually build a low-code application using Power Apps. With the improved power of low-code applications, we can roll out small apps for dedicated purposes.
Thanks to Conjur, we can properly guard application secrets, even in a low-code platform such as Power Apps. Using a custom connector to an Azure Function, we ensure we only expose secrets to our Power Apps project. Now that you know how, you can protect all your low-code apps with the level of security your users expect, through Conjur’s flexible and easy-to-use secrets management tools.
What will you do with Conjur? Install Conjur and start using it today to strengthen your project’s security.

John Walsh has served the realm as a lord security developer, product manager and open source community manager for more than 15 years, working on cybersecurity products such as Conjur, LDAP, Firewall, JAVA Cyptography, SSH, and PrivX. He has a wife, two kids, and a small patch of land in the greater Boston area, which makes him ineligible to take the black and join the Knight’s Watch, but he’s still an experienced cybersecurity professional and developer.